Fast Buds Germination Guide

- 1. Troubleshooting
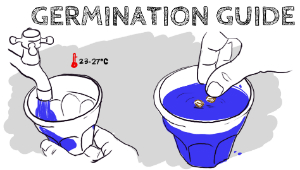
After years of experimentation on hundreds of plants seeds, here’s what we’ve found to be the easiest and most effective way to germinate seeds. Your mileage may vary – but surely not by much. First, pour a small glass of room temp water (75-80°F / 23-27°C). Tap water is fine, provided it’s not super high pH (7.3 pH is a good level).
Carefully place your Fast Buds seeds onto the surface of the water with a spoon. The seeds should be floating, but resist touching them with your fingers! This method is particularly effective for seeds with resilient shells, or to “wake up” seeds that have been in refrigeration for over a year. Next, place the glass in a very dark place (68-77°F / 20-25°C) and leave for 2-3 days until they start to germinate.

If they are not germinating after 72 hours, add a few drops of hydrogen peroxide and return to the darkness for 2 more days. Once you see a tiny “tail” extending out 1 centimeter, the seed is good to come out of the water.
With a tweezer, carefully plant the cracked seeds a couple of centimeters deep, with tails pointing down, then cover with soil and lightly pat it down. Once buried, spray water right on top of each seed, and keep it moist and dark until the plant gets growing.

Maintain the temperature/humidity at around 78°F / 25°C and about 50% humidity. Very soon she’ll sprout upwards towards the light!
Troubleshooting
So, now you’re equipped with an incredibly efficient and reliable way to germinate seeds. However, things don’t always go to plan. Therefore, what good would a germination guide be without some troubleshooting tips? While germination refers to the emergence of the taproot from the seed. However, germination and the rest of the seedling phase are intimately connected. Below, you’ll discover what to do when germination fails, and how to correct common problems with your seedlings in the critical days after germination ends and seedlings begin to establish themselves. Grab a notebook, brew a cup of coffee, and prepare to deepen your plants knowledge in a way that will save you a lot of time and effort in the future.
Failed Germination
Sometimes, seeds simply just don’t pop. Several factors can cause this disappointing event to pan out. Firstly, you need to make sure that you have mature seeds that aren’t too aged. Seeds returned too early will have a greenish appearance, whereas seeds that are too old will appear dark brown/black, and will easily become crushed when squeezed between your thumb and index finger. Healthy seeds are firm, brown, and have a healthy sheen to them. If you’re direct sowing, you might experience failed germination due to your growing medium drying out. You can avoid this by soaking seeds in a glass of water first for 12–24 hours.
Legginess
During the first couple of days following germination, you might notice your seedling becoming overly long. Known as legginess, this is caused by growth hormones within plants fuelling growth in a desperate attempt for adequate light intensity. To avoid this, you should use a strong lamp that provides enough light intensity. You can measure this variable using either a lux meter or a photosynthetically active radiation (PAR) meter. You should start running your lights as soon as shoots begin to emerge from the soil, and ideally, keep them on for 24 hours a day during the first week.
Weak stems
Growing indoors exposes plants to a synthetic environment. Outdoors, and plants are subject to the element, including wind. This forces them to develop vigorous stems and expand their root systems into the ground in order to anchor themselves down. To avoid weak stems, you should set up some fans within your growing space to gently blow across your seedlings—just don’t blast them too hard!


Comments